When I discovered OOP McCall's 5818 (through reviews on sewing.patternreview.com of course), I wanted it! The simple dress is exactly the type of garment I like to sew and wear. I like the other pieces (except for the crazy large lapels on the jacket), but honestly, I doubt I'll ever sew them. I bought this one for the dress.

Did it look like the photo/drawing on the pattern envelope once you were done
sewing with it?
Yes, even though I used crazy fabric (see more
below)
Were the instructions easy to follow?
Instructions are
very detailed and have lots of information on fitting using the Palmer/Pletsch
methods, however I don't like their construction process for this dress. I
prefer an all machine clean finish. Nicegirl/Slapdash has an excellent tutorial
on her blog. This dress is quite narrow at the shoulders, so I needed the long handle of a plastic cooking spoon to help push the fabric through.
What did you particularly
like or dislike about the pattern?
Talk about bang for your buck, this
pattern has it all! I mostly bought it for the dress though since that's what I
like to wear when I'm not working.
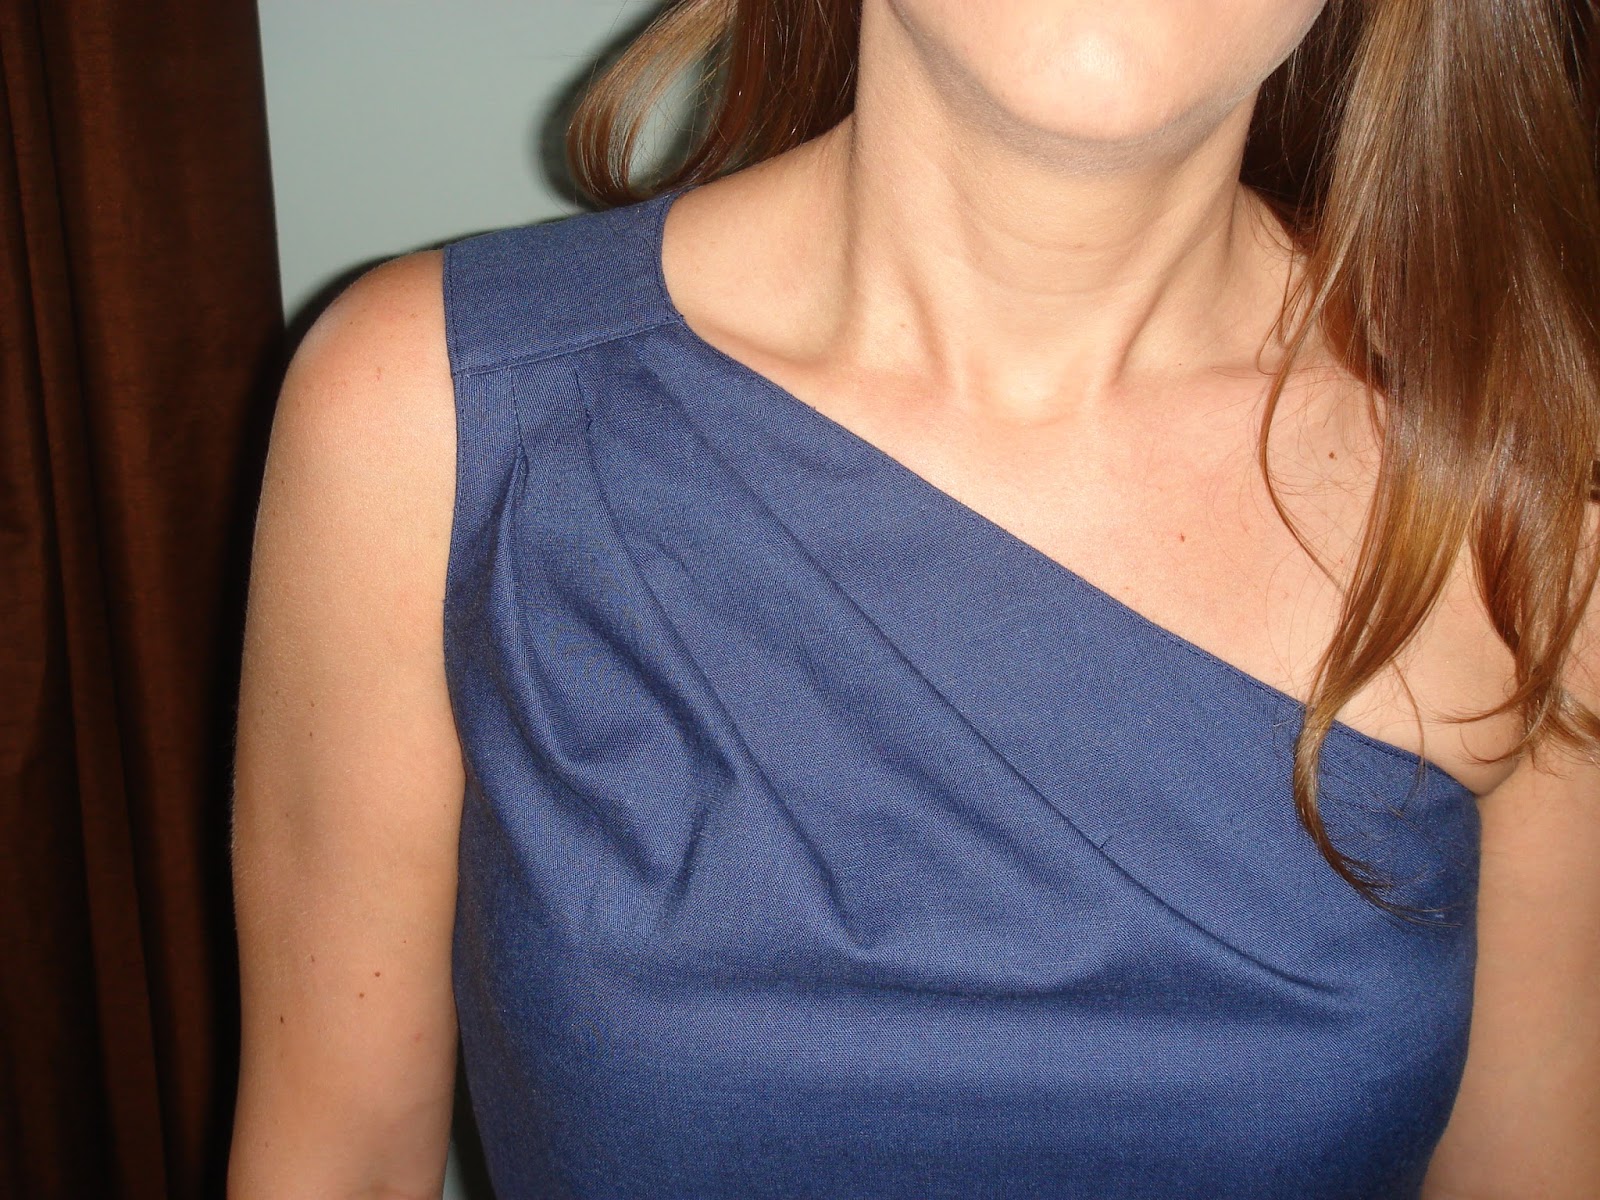
The lining for this dress
includes the neckline pleats which seams odd to me because this could create unnecessary bulk. Since this was my first time making it, I decided to go with the pattern. I think for future versions (and given my satisfaction with the finished project, there likely will be more!) I will convert the neckline pleats to bust darts for the lining.
 |
| McCall's 5818 line drawing |
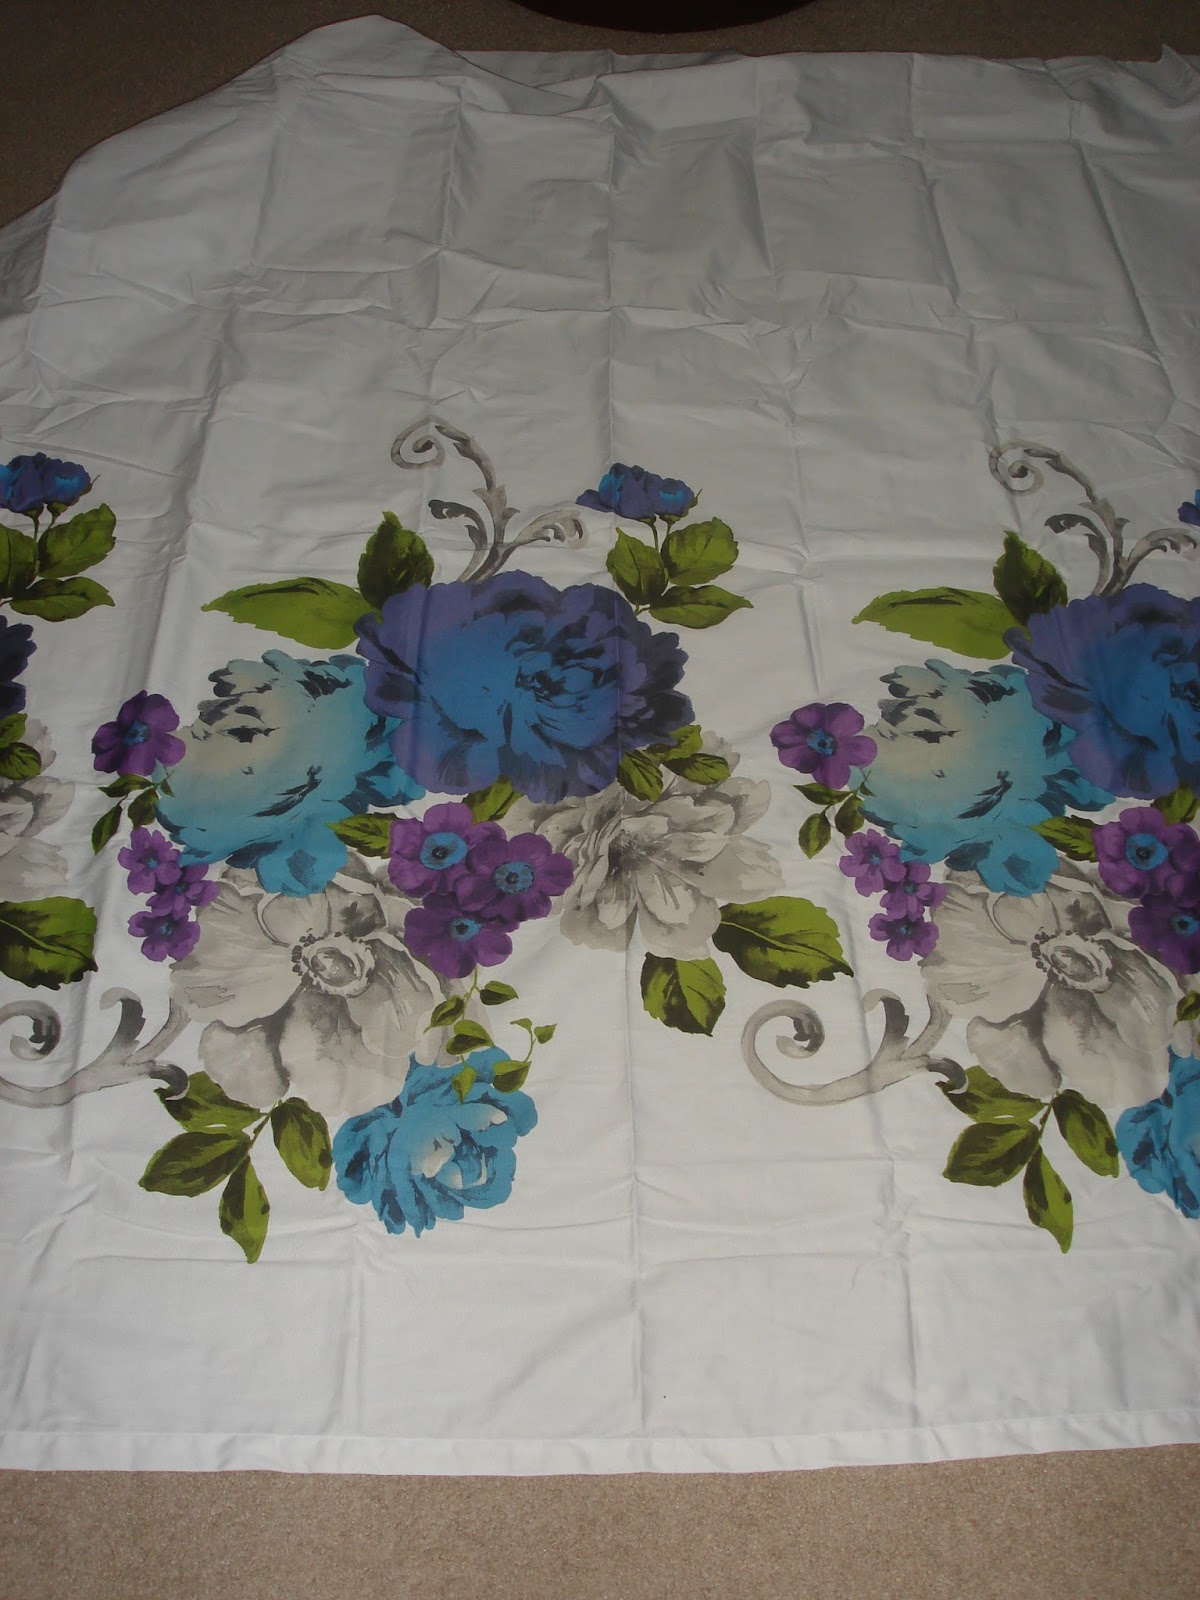
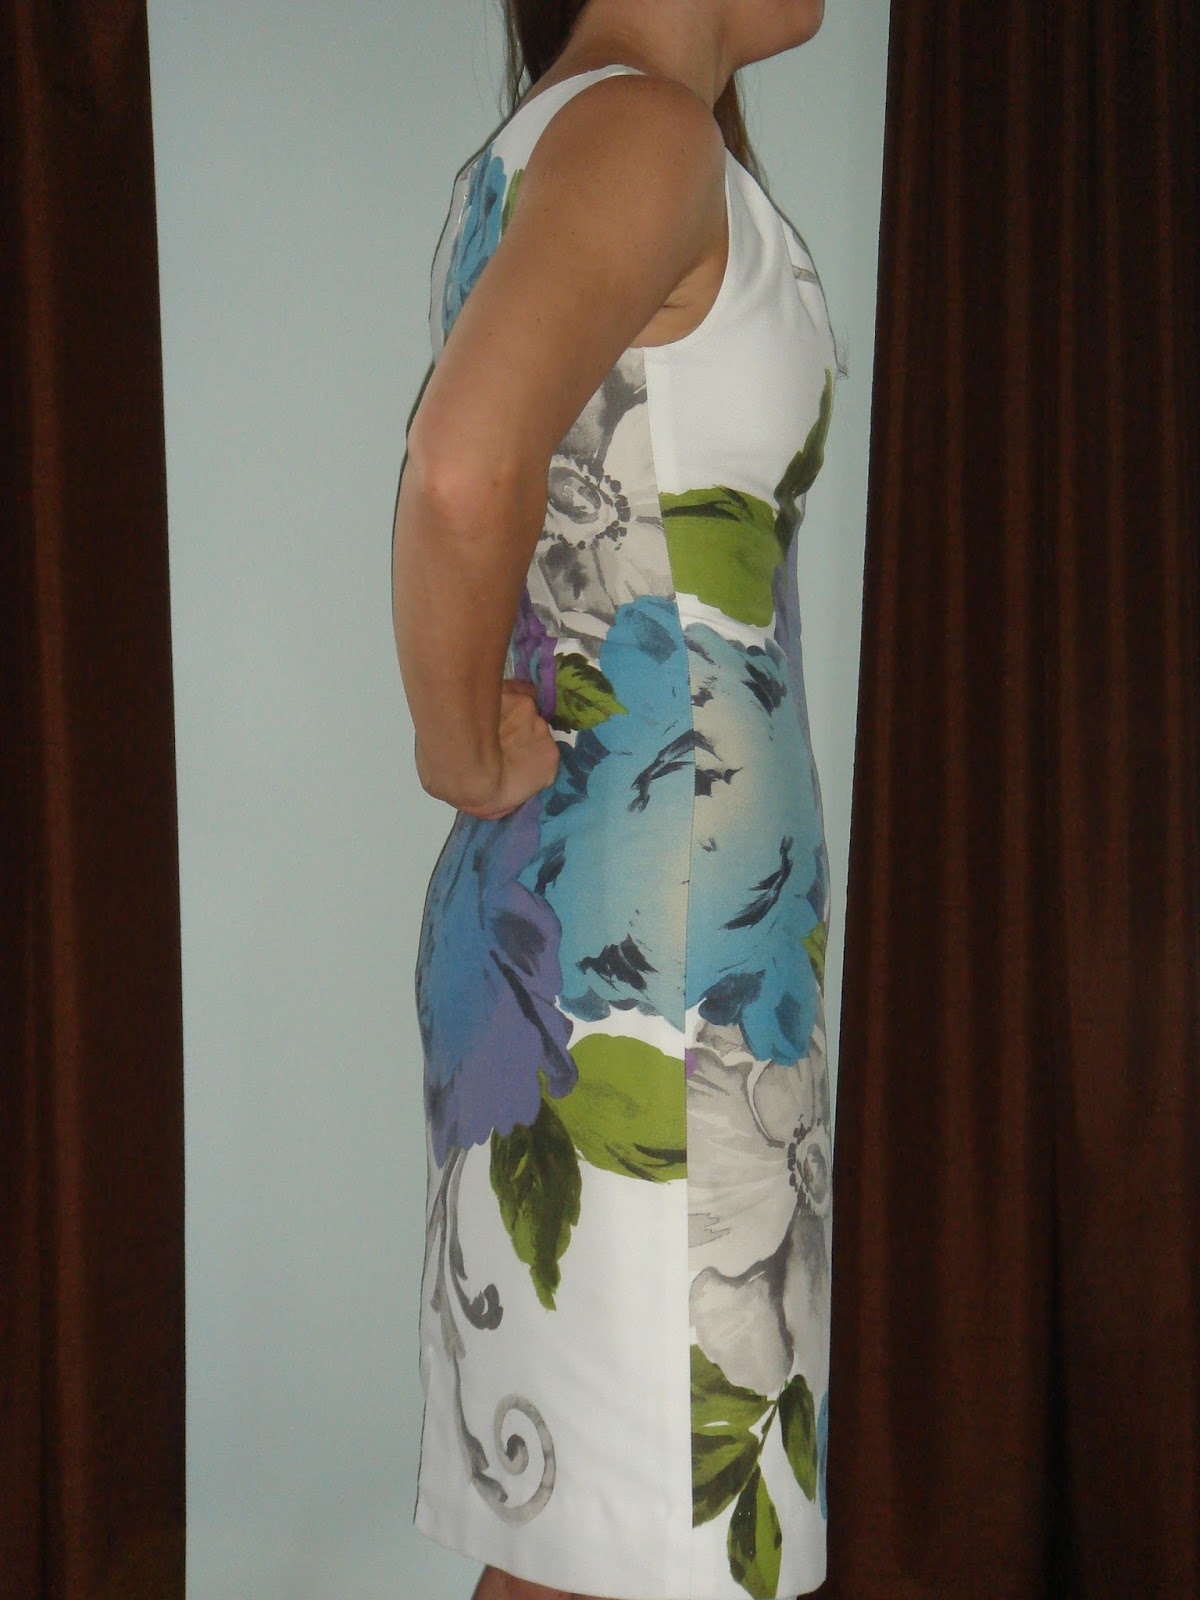
Fabric Used:
Not sure if I should
be proud or embarrassed... It's a cotton/poly shower curtain (seems like a
mid-weight twill) that I bought from Marshall's for $15, and I lined it with
some lightweight white cotton from old sheets. I sew with lots of vintage silk saris, which doesn't embarrass me at all, but using a shower curtain is a departure from my normal projects. I just loved the print though! I wore this to my husband's cousin's afternoon wedding and hoped none of the guests had this shower curtain hanging in their bathroom, or it would have been a bit embarrassing.. HAHA

Pattern alterations or
any design changes you made:
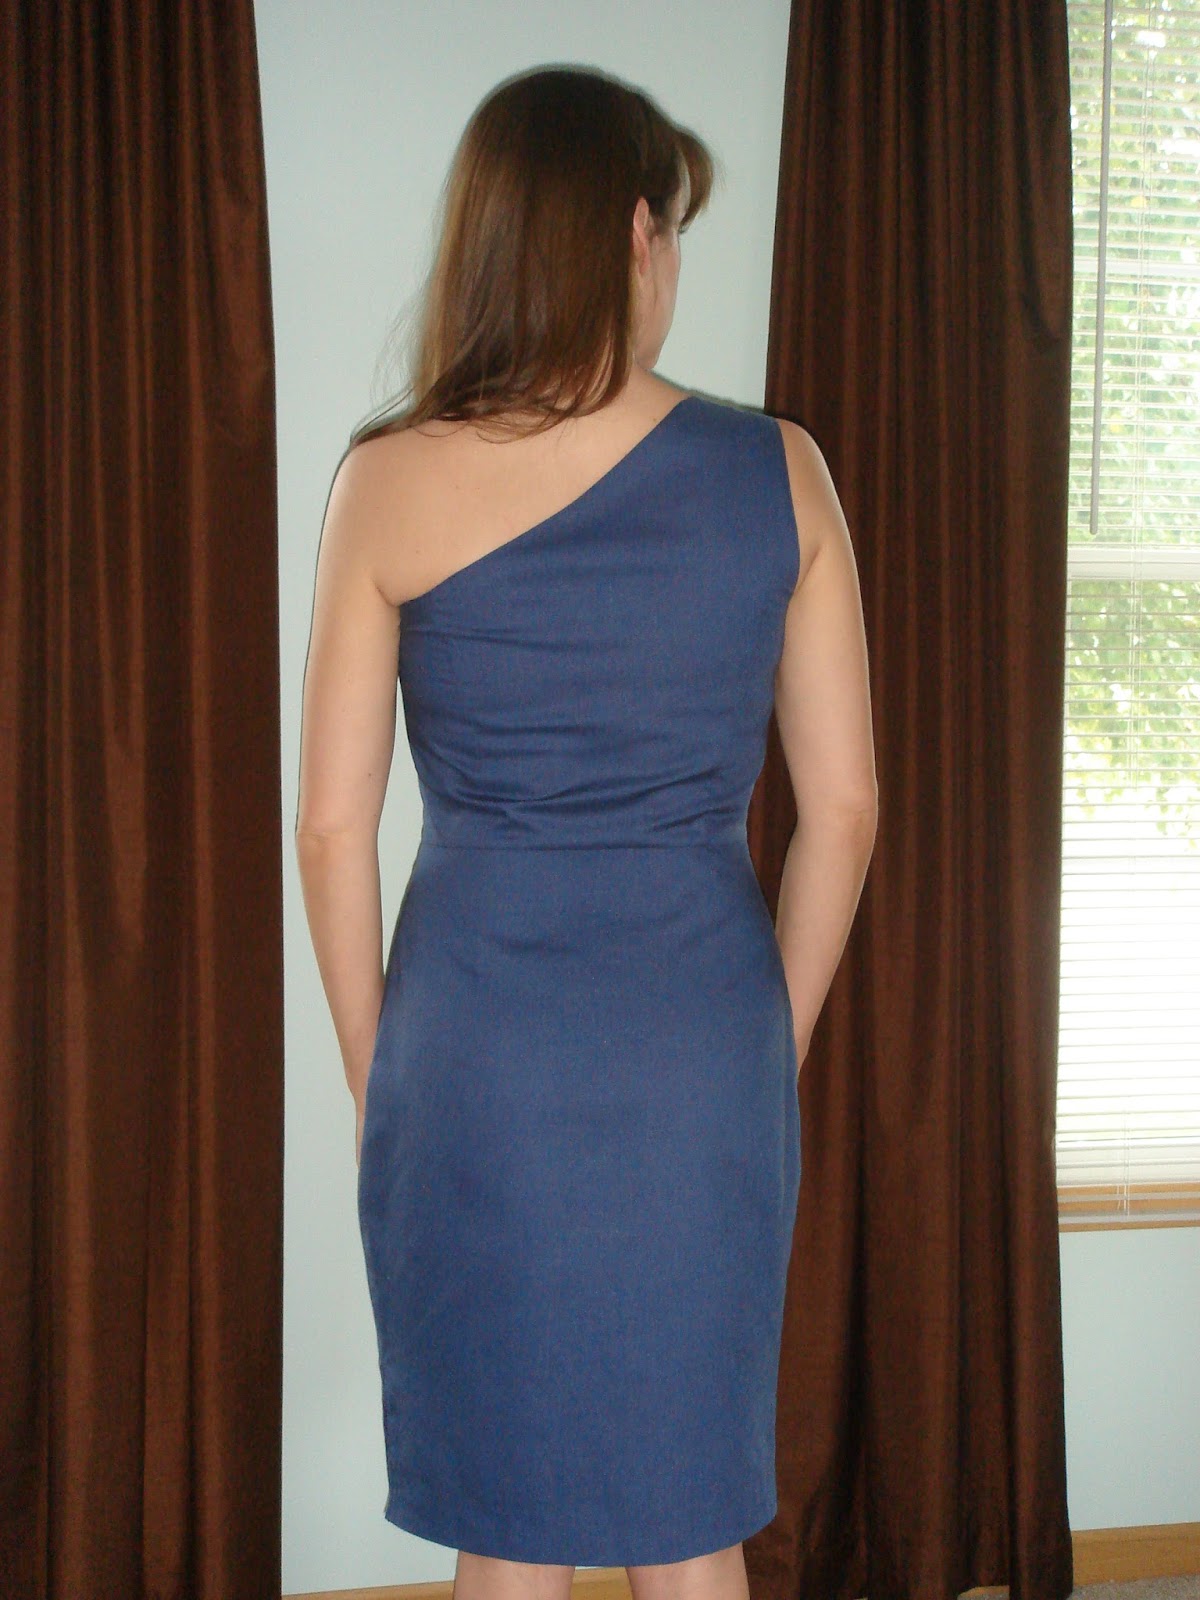
I used a very large border print and spent HOURS agonized over the layout. I copied the pattern so that I was working with full pieces, that were not folded. This helped me more accurately determine the layout. Since the print is so bold, I was concerned about inappropriate placement, and about transitions at the side seams, which I thought would be a bit jarring and detract from the design. The best option I came up with was to invert the pieces for the back, so that I could semi-match the one side seam. I hope the inversion is less obvious than having a drastic color change at both sides. Since the blue flower was a bit more eye-catching, I chose to match it rather than the grey. The center back seam is contoured, so only part of it could be matched. I decided the very large flower on my bum was taking priority!
I thought the back neckline pleats were a nice design detail but they created quite a problem. If you read the Palmer/Pletsch book, they do talk a good bit about how forward shoulders and high round back are becoming more common in younger people due to our computer work, and I think they've built this into the dress design. While I technically have both, mine aren't severe, so I rarely adjust for it. The pleats were too much in my heavier fabric and created a giant *pouf* over the shoulder blades that made me look like the hunchback of Notre Dame.
My quick fix for this, since I didn't make a muslin, was to change the back pleat to a dart and create a seam joining it with the back waistline dart to eliminate the extra fabric over the shoulder blades. This also revealed that the back neckline was a bit too large, so I then deepened the neckline pleat to remove the excess. I also didn't like how high the back was (since this makes it difficult for me to zip) so I lowered it 1.5 inches. I also prefer back necklines slightly lower in case I wear a necklace. In future versions, I would probably attempt to redraft the upper back and neckline to eliminate the back neckline dart completely and avoid the extra bulk over the shoulder blades. Mahogany Stylist mentioned that she normally makes a prominent shoulder blade adjustment, but didn't find it necessary in this dress, which confirms my findings.
 |
| lowered back neckline |
 |
| after lowering neckline, increased pleat and merged with dart |
I made a straight 10 and only hemmed it 1/4 inch more than the pattern suggested! I was really excited to have something fit so well with no other adjustments necessary. That never happens for me unless the skirt is full, because I normally must size the waist down to a 9 and the hips down to an 8 or a 6. Consider this cautionary if you're pear shaped and measure carefully before cutting.
Since the shoulders are so narrow, I also added lingerie carriers to prevent bra straps from crawling out.


Would you sew it again? Would you recommend
it to others?
Such a great basic but a bit more interesting than a plain sheath. I love simple dresses, usually because
I like difficult fabrics haha.

Conclusion:
It's literally 2
pieces (front and back) plus a lining! A simple sheath dress is a great staple and this one can be made with only 1 1/4 yards of 45" inch fabric (made in size 10 and not including your lining of course). Once you work out any fit issues, this one can be a great canvas for indulging in expensive fabric.